Last week I had the pleasure of travelling to Napa Valley. During the trip I visited a few wineries and selected three bottles of wine to bring home. I am definitely not a wine expert, but I do go with what I like. Being an Asian with a mutated form of alcohol dehydrogenase, I naturally like to pick wines lower in alcohol content (around 10% is ideal). I also have a sweet tooth.
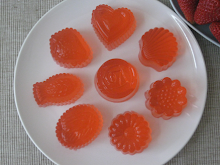
The first winery I visited was V. Sattui. They are a small family-owned winery and make good quality wines. http://www.vsattui.com/. The Muscato, with it's fruity apricot and orange bloom bouquet, really appealed to me during the tasting. So did the Gammay Rouge (a Rose) with strawberry overtones. I also love the rich strawberry color....So... I bought two bottles of wine!
The first winery I visited was V. Sattui. They are a small family-owned winery and make good quality wines. http://www.vsattui.com/. The Muscato, with it's fruity apricot and orange bloom bouquet, really appealed to me during the tasting. So did the Gammay Rouge (a Rose) with strawberry overtones. I also love the rich strawberry color....So... I bought two bottles of wine!


I also visited a bigger scale winery, Robert Mondavi. It was amazing to see rows and rows of uniformly lined up vines. I also gave a talk on wine making and chemistry there.
http://www.robertmondaviwinery.com/flash/index.cfm?month=4&day=14&year=1986&x=63&y=24
http://www.robertmondaviwinery.com/flash/index.cfm?month=4&day=14&year=1986&x=63&y=24
Here, I was given (very generous of the staff of Robert Mondavi, welcoming me as a speaker) a bottle of highly rated Cabernet Sauvignon 2004. I haven't tasted it yet, but I am sure it is as good as what the expert reviewers are saying online.
Anyways, when I got home, I found out later that Moscato goes really well with apple pie, so for dessert this weekend, this is what I made.

The cutters are available here:http://biodiversityherbs.com/products/cookiecutters/assortedcookiecutters.html


 5) Arrange all the little cut outs, overlaping each other slightly to form a top pie crust.

Let's pour the wine that I lugged back from Napa Valley!


I hope you are having a good week!
Sincerely,
Julie

But, I didn't just want to make an apple pie. I wanted it to be extra special, so I cut it out using the apple cutter to create a beautiful pie crust with all cut outs. The beautiful part about making the crust this way is the overlapping of small pieces of dough creates a natrual vent for the steam to escape. There is no need to cut any slits to let the steam out, the pastry stays put beautifully . The result is a beautifully elegant pie that is both delicious and presentable. I share with you here my apple pie recipe:
Pastry
Pastry
Making good pastry is really practice makes perfect. The ingredients are basic, and with a little bit of practice, anybody can make a flaky pie crust in no time. And no, you don't need a food processor! I made my pie crust using nothing but a pastry cutter and a fork. The result was a melt in your mouth, crumbly crust. It also helps to use the highest quality European butter. The butter works itself easier into the flour. I have written the recipe carefully so that you can have similar results at home. And, as always, I can't stress often enough, you have to use an oven thermometer.
2 1/2 cups all purpose flour
2 sticks (1 cup of unsalted butter, cold, cut it into 0.5 cm cubes)
1 teaspoon salt
1/4 cup ice water
1) Sift the flour 3 times. Raise the sifter as high as you can without making a mess. We are going to incorporate air into the flour.
2) Put the cutted butter into the flour. Using your hands, gently lift the flour from the bottom to the top so that the butter is superficially coated with flour.
1) Sift the flour 3 times. Raise the sifter as high as you can without making a mess. We are going to incorporate air into the flour.
2) Put the cutted butter into the flour. Using your hands, gently lift the flour from the bottom to the top so that the butter is superficially coated with flour.
3) Using a pastry cutter and working quickly, cut the butter into the flour until it reassembles bread crumbs. (Use an up and down motion, do not rock the cutter back and forth or the butter will press itself into a big lump and we want to try to avoid that).
4) Using your fingertips, pick up little pieces of the "crumbs" and rub for 2-3 seconds. Drop it and repeat. This step incorporates the fats into the flour to give it the melt in your mouth texture. Work quickly and efficiently!
5) Put 1 tablespoon of water at the time and use a fork to "rake" the water into the crumbs.
6) To test if enough water is added, take a little bit of the dough and press it together, if it holds, you have added enough water.
7) Divide dough in half. Put each half of the dough on a big piece of cling wrap and give it a few firm but gentle kneads. Wrap the dough in the cling wrap and refrigerate for 1 hour before rolling it out.
Filling
2 pounds assorted apples: I used Jonagold, Braeburn and Empires. Peeled, cored and cut into 1/4 inch thick slices
2 pounds assorted apples: I used Jonagold, Braeburn and Empires. Peeled, cored and cut into 1/4 inch thick slices
Juice of 1 lemon
1/3 cup sugar
3/4 teaspoon ground cinnamon
1/4 teaspoon freshly grated nutmeg
1/4 teaspoon salt
2 tablespoon unsalted butter
1) In a large bowl, toss everything together (except the butter) until the apples are evenly coated.
Assembly
1)Roll out the each half of the dough into a 12 inch disk
2)Fit the dough into a 9 inch glass pie plate and press the dough on the edge of the plate. Trim the excess overhanging dough.
3) Put in the apple pie filling by arranging the apples neating in a circle. Dot the filling with the 2 table spoon of butter.
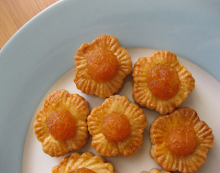
4) Using the other half of the dough, cut out little apple shapes
The cutters are available here:http://biodiversityherbs.com/products/cookiecutters/assortedcookiecutters.html


 5) Arrange all the little cut outs, overlaping each other slightly to form a top pie crust.
6) Give it a good egg wash. Freeze pie for 30 mins.
7) Preheat oven to 400 F. Bake until pie turns golden (about 20 mins) then lower the temperature to 350 F. Continue baking for 40-50 mins or until the filling has thicken and the juices are bubbling.
Hey, what am I waiting for?!

Let's pour the wine that I lugged back from Napa Valley!

Cut the pie up and eat it! Yummy!

I hope you are having a good week!
Sincerely,
Julie